Why We Needed an Industrial RFID Printer
Every hardware asset entering or leaving the IT office needs to be tagged before it moves. For years, barcode labels handled this — but as the device count grew past 1,500 units, the limitations became clear: barcodes need line-of-sight, they wear out in high-traffic areas, and bulk audits still require scanning each device one at a time.
RFID-enabled asset tags change that. A single RFID reader can log dozens of devices in seconds, and the data ties back to the asset management system automatically. The Zebra ZT411R is the industrial printer that makes this possible — and this post is the deployment guide I wish I had before I started.
The Hardware: Zebra ZTC ZT411R-203dpi ZPL
The ZT411R is an industrial-grade thermal transfer label printer with a built-in UHF RFID encoder. It prints and programmes RFID inlays in a single pass — one label, barcode and RFID data encoded simultaneously.
Confirmed specs from production deployment:
- Model: ZTC ZT411R-203dpi ZPL
- Print method: Thermal Transfer
- Resolution: 203 dpi
- RFID: UHF encoder built-in, ZBI 2.1, RFID status READY in production
- Connectivity: Internal Wired PrintServer (ZebraNet), USB, Serial
- Firmware: V92.21.34Z (current production release)
- Language: ZPL II
- Memory: ~63MB onboard flash, ~7.6MB RAM — full font library loaded
RFID label specification used in production:
- LABEL SYNTHETIC 60×25MM RFID COATED ACRYLIC ADH 76.2MM 400/Roll
- Order through your local vendor / field IT procurement channel
Reference Documents
Before starting, gather the following documents. These cover the complete setup process end-to-end:
| Document | What it covers |
|---|---|
| 1-Printer_unbox__Install_Supplies.docx | Unboxing, ribbon and media loading |
| 2-EU_RED_Security-Active_Printer.docx | EU RED security activation via Zebra Setup Utilities |
| 3-Printer_network_registration_steps.docx | Network connection and Printer Team registration |
| KB - printer setup.docx | Full printer configuration reference |
| KB - RFID labels printing.docx | Label printing workflow and label specs |
| KB - RFID scanner setup.docx | Scanner configuration (keyboard mode via Desktop123) |
| KB - scanning process.docx | RFID scanning process documentation |
| Printer Calibration.docx | Manual calibration step-by-step |
| Label Adjuster.MOV | Video: label position adjustment |
| RFID Calibration Process.MOV | Video: full RFID calibration walkthrough |
| Ribbon and Label Position.MOV | Video: ribbon and label loading |
| Sensor label Adjust.MOV | Video: sensor adjustment |
| Where the Sensor must light.MOV | Video: correct sensor indicator position |
All documents and videos are available in the shared IT printer resources folder.
Step 1: Unboxing and Physical Installation
Before powering on, complete a full physical verification.
Unboxing checklist:
- Printer unit — no damage to printhead, platen roller, or chassis
- Power cable
- USB cable
- Quick start guide
- RFID antenna module seated correctly in the base
Placement requirements:
- Flat, stable surface — vibration causes RFID calibration drift
- At least 4 inches of clearance on all sides for ventilation
- Network port within cable reach — always prefer wired Ethernet over Wi-Fi for production
- Away from other UHF emitters — nearby RFID readers interfere with calibration
Place the printer at the asset staging area so devices can be tagged immediately after being logged.
Step 2: Loading the Ribbon (Thermal Transfer)
Reference video: Ribbon and Label Position.MOV
The ZT411R requires a ribbon in addition to label media (thermal transfer printing).
- Open the top cover
- Unroll approximately 30cm of ribbon from the supply roll
- Thread the ribbon leader through the ribbon path — over the printhead and onto the take-up spindle
- Attach to the take-up spindle and rotate manually until taut with no wrinkles
- Close the top cover
Critical: match ribbon width to label width. A narrower ribbon leaves unprinted edges and accelerates printhead wear.
Step 3: Loading RFID Media
Reference video: Ribbon and Label Position.MOV · Sensor label Adjust.MOV · Where the Sensor must light.MOV
RFID media loading requires more care than a standard label printer — the RFID inlay must align precisely with the antenna window inside the printer.
- Open the media compartment (top lid lifts fully)
- Thread the label roll through the media guides
- Critical: position the roll so the RFID inlay passes directly over the RFID antenna window in the base — even 2mm off-centre causes consistent void tags
- Push the media guides firmly against the label edges — loose guides cause feed errors and calibration failures
- Feed media through to the tear bar
Run a basic test print before proceeding to calibration. Clean text and sharp edges confirm the mechanical setup is correct.
Step 4: Manual Media Calibration
Reference: Printer Calibration.docx · Video: Sensor label Adjust.MOV
Manual calibration is required after every roll change. It teaches the gap sensor exactly where each label starts and ends.
- Press and hold Pause and Cancel simultaneously for a few seconds — the printer enters manual calibration mode
- Follow the on-screen prompts
- Important: when prompted, remove the ribbon — the sensor must read the label backing without the ribbon in place
- Once calibration completes, press Feed to test — the printer should advance exactly one label at a time
- If it feeds more than one label, calibration did not complete — repeat the process
Each time a label roll runs out and a new one is loaded, this calibration must be repeated.
Step 5: RFID Calibration
Reference: KB - printer setup.docx · Video: RFID Calibration Process.MOV
RFID calibration is separate from media calibration and must be performed after every roll change.
- Navigate to Menu → RFID Icon → RFID Calibrate → Start Calibration
- When prompted, select your country/region from the list
- The calibration runs automatically — it takes more than 5 minutes to complete properly
- If it finishes in under 2 minutes, it has not completed — run it again
Verify: print a test label and confirm the RFID data reads back correctly. A void read means calibration needs repeating before loading a full production roll.
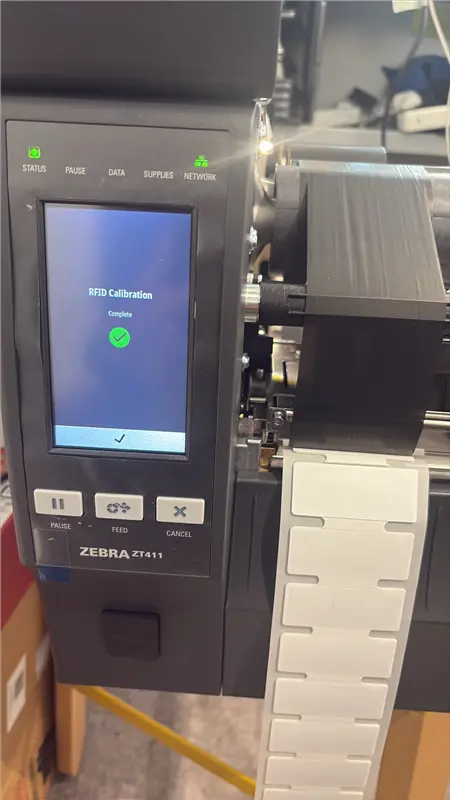
RFID Calibration Complete — green tick confirms the encoder is aligned and ready for production.
Step 6: EU RED Security Activation via Zebra Setup Utilities
Reference: 2-EU_RED_Security-Active_Printer.docx
EU RED (Radio Equipment Directive) compliance is mandatory for all RF-emitting equipment. The ZT411R ships with certain connectivity and management functions disabled by default when EU RED is active. To restore these functions correctly, a Security Setup File must be sent to the printer using Zebra Printer Setup Utilities for Windows.
This is not done from the front panel alone — it requires a Windows computer and a USB cable.
Step 6.1 — Download Zebra Printer Setup Utilities
Download Zebra Printer Setup Utilities for Windows from zebra.com/support. Install and open it on your Windows computer.
A video guide is available — watch from the beginning until 2:10 minutes for the relevant section.
Step 6.2 — Connect the Printer via USB
Connect the ZT411R to your Windows computer using a standard USB Type-A to Type-B cable (the square-ended printer cable). The printer will appear in Zebra Setup Utilities.
Step 6.3 — Select the Printer
In Zebra Setup Utilities, the printer list will show your ZT411R. Select it to highlight it.
Step 6.4 — Open Communication with Printer
Under Printer Configuration, click Open Communication With Printer. This opens the Direct Communication window — a text interface for sending commands directly to the printer.
Step 6.5 — Send the Security Setup File
- Paste the contents of the Security Setup File (provided in the reference document 2-EU_RED_Security-Active_Printer.docx) into the top section of the Direct Communication window
- Click Send to Printer
- Watch the bottom window — responses appear as the code executes on the printer
- When the response shows
{"protect":{"status":0,"operation":"setup"}}{"protect":{"status":100,"operation":"configure-one"}}— the setup has completed successfully - Close the Direct Communication window
This process restores management functions while keeping the printer compliant with EU RED regulations.
Step 7: Head Close Action — Prevent Label Waste
Navigate to: Settings → Head Close Action → No Motion
This prevents the printer from feeding a label every time the printhead is opened and closed, which wastes media.
Step 8: Disable Sleep Mode / Power Save
Before connecting to the corporate network:
- Navigate to Settings on the printer screen
- Locate Power Save or Energy Star
- Set to Disabled or Off
Why this matters: network teams monitor switch port activity. A sleeping printer appears idle and the port can be disabled — causing a silent loss of network connectivity and a potential IP address change on reconnect, which breaks all print queues.
Step 9: Network Registration
Reference: 3-Printer_network_registration_steps.docx
- Connect the printer to the corporate network via Ethernet cable (DHCP)
- If needed, raise a ticket for switch port activation
- Find the assigned IP address on the printer display: Network → Wired → Wired IP Address
- Contact the Printer Team — provide the printer's MAC address and assigned IP. They will assign a hostname, create a DHCP reservation (stable IP), and register the printer in the network directory. Some users do not have access to the network portal, so this step must be handled by the Printer Team
- Only after IP is confirmed stable — configure print queues on workstations
Do not configure print queues until the DHCP reservation is in place. One IP change after a reboot breaks all connected workstations silently.
Step 10: Verify Full Configuration
Once everything is configured, open the printer's IP address in a browser to confirm:
- Status: READY ✓
- RFID Status: READY ✓
- ZebraNet Print Server: Link Good, 100Mb/s, Bidirectional ✓
- Firmware: current version ✓
- RTC date/time: set correctly ✓
Key printer settings confirmed in production:
| Parameter | Value |
|---|---|
| Print mode | Thermal Transfer |
| ZPL mode | ZPL II |
| Head Close Action | No Motion |
| Power Save | Disabled |
| RFID | ZBI 2.1, Status READY |
| Firmware | V92.21.34Z |
CLEA Integration
Once the printer is fully operational, it integrates with the CLEA asset lifecycle management system. RFID tags printed by the ZT411R are scanned via the CLEA mobile app and hand scanners, updating asset records in real time. This is the primary workflow for all new IT equipment entering the office.
Daily Asset Tag Printing Workflow
- New device arrives — asset record created in the IT asset management system
- Label printed — select the correct label format (60×25mm RFID), print one label per device
- RFID verified — scan the freshly printed tag to confirm data before applying
- Label applied — clean the device surface, apply in the standard position
- Asset record updated — status updated to tagged/assigned in the system
Troubleshooting
| Problem | Likely Cause | Fix |
|---|---|---|
| VOID message on labels | RFID calibration not completed correctly | Repeat RFID calibration steps |
| Label gap between each print | Incorrect sensor position | Run manual calibration; watch sensor position videos |
| QR/barcode in wrong position on label | Label template offset | Adjust fine-tuning in the label template code |
| Scanner cannot scan anything | Scanner not in keyboard mode | Set keyboard mode in scanner config using Desktop123 software |
| Calibration fails repeatedly | Media guides not firm against label edges | Push guides firmly to label width, retry |
| Printer feeds multiple labels | Manual calibration incomplete | Repeat Pause + Cancel with ribbon removed |
| Print server not accessible | Printer got a new DHCP IP | Check IP on screen, request DHCP reservation from Printer Team |
| RFID calibration completes in under 2 min | Calibration did not run fully | Run Start Calibration again |
| Network port disabled | Sleep mode was enabled | Disable Power Save, contact network team to re-enable port |
What This Enables
With the Zebra ZT411R fully operational:
- Status: READY — confirmed via printer web interface, accessible from any authorised workstation on the network
- RFID encoding on every label — every device tagged in a single print pass
- Bulk audits in minutes — RFID readers log multiple devices simultaneously
- Full chain of custody — every RFID tag tied to a record in the asset management system
- CLEA integration — RFID tags scanned via mobile app for real-time asset record updates
- Network-connected — print from any authorised workstation via ZebraNet print server
The full deployment — from unboxing to first production tag — takes less than one working day when the reference documents are followed in order.
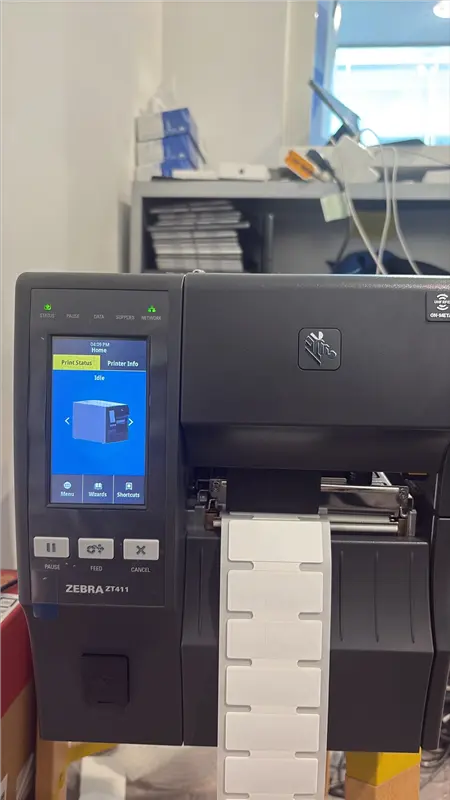
Printer home screen — Print Status Idle, RFID label media loaded and ready for the next job.
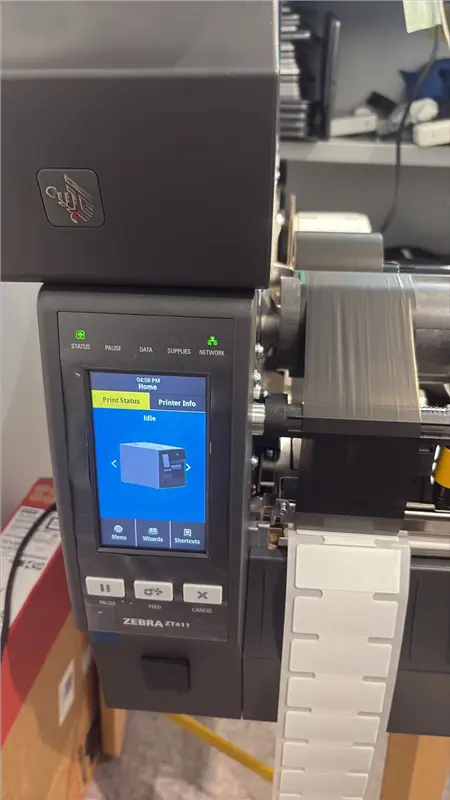
Print Status screen — printer fully configured, Idle, connected to network (NETWORK indicator lit green).
References
- Zebra ZT411 / ZT421 Ribbon Media Sensor Manual Calibration — support.zebra.com
- Zebra Printer Setup Utilities for Windows — zebra.com/support
- Zebra Support Centre — Drivers, Firmware, Documentation, Warranty Check — support.zebra.com